"For I know the plans I have for you," declares the Lord, "plans to prosper you and not to harm you, plans to give you hope and a future." Jer 29:11 (NIV)

Friday, December 30, 2022

Prairie Points Block - A Tutorial

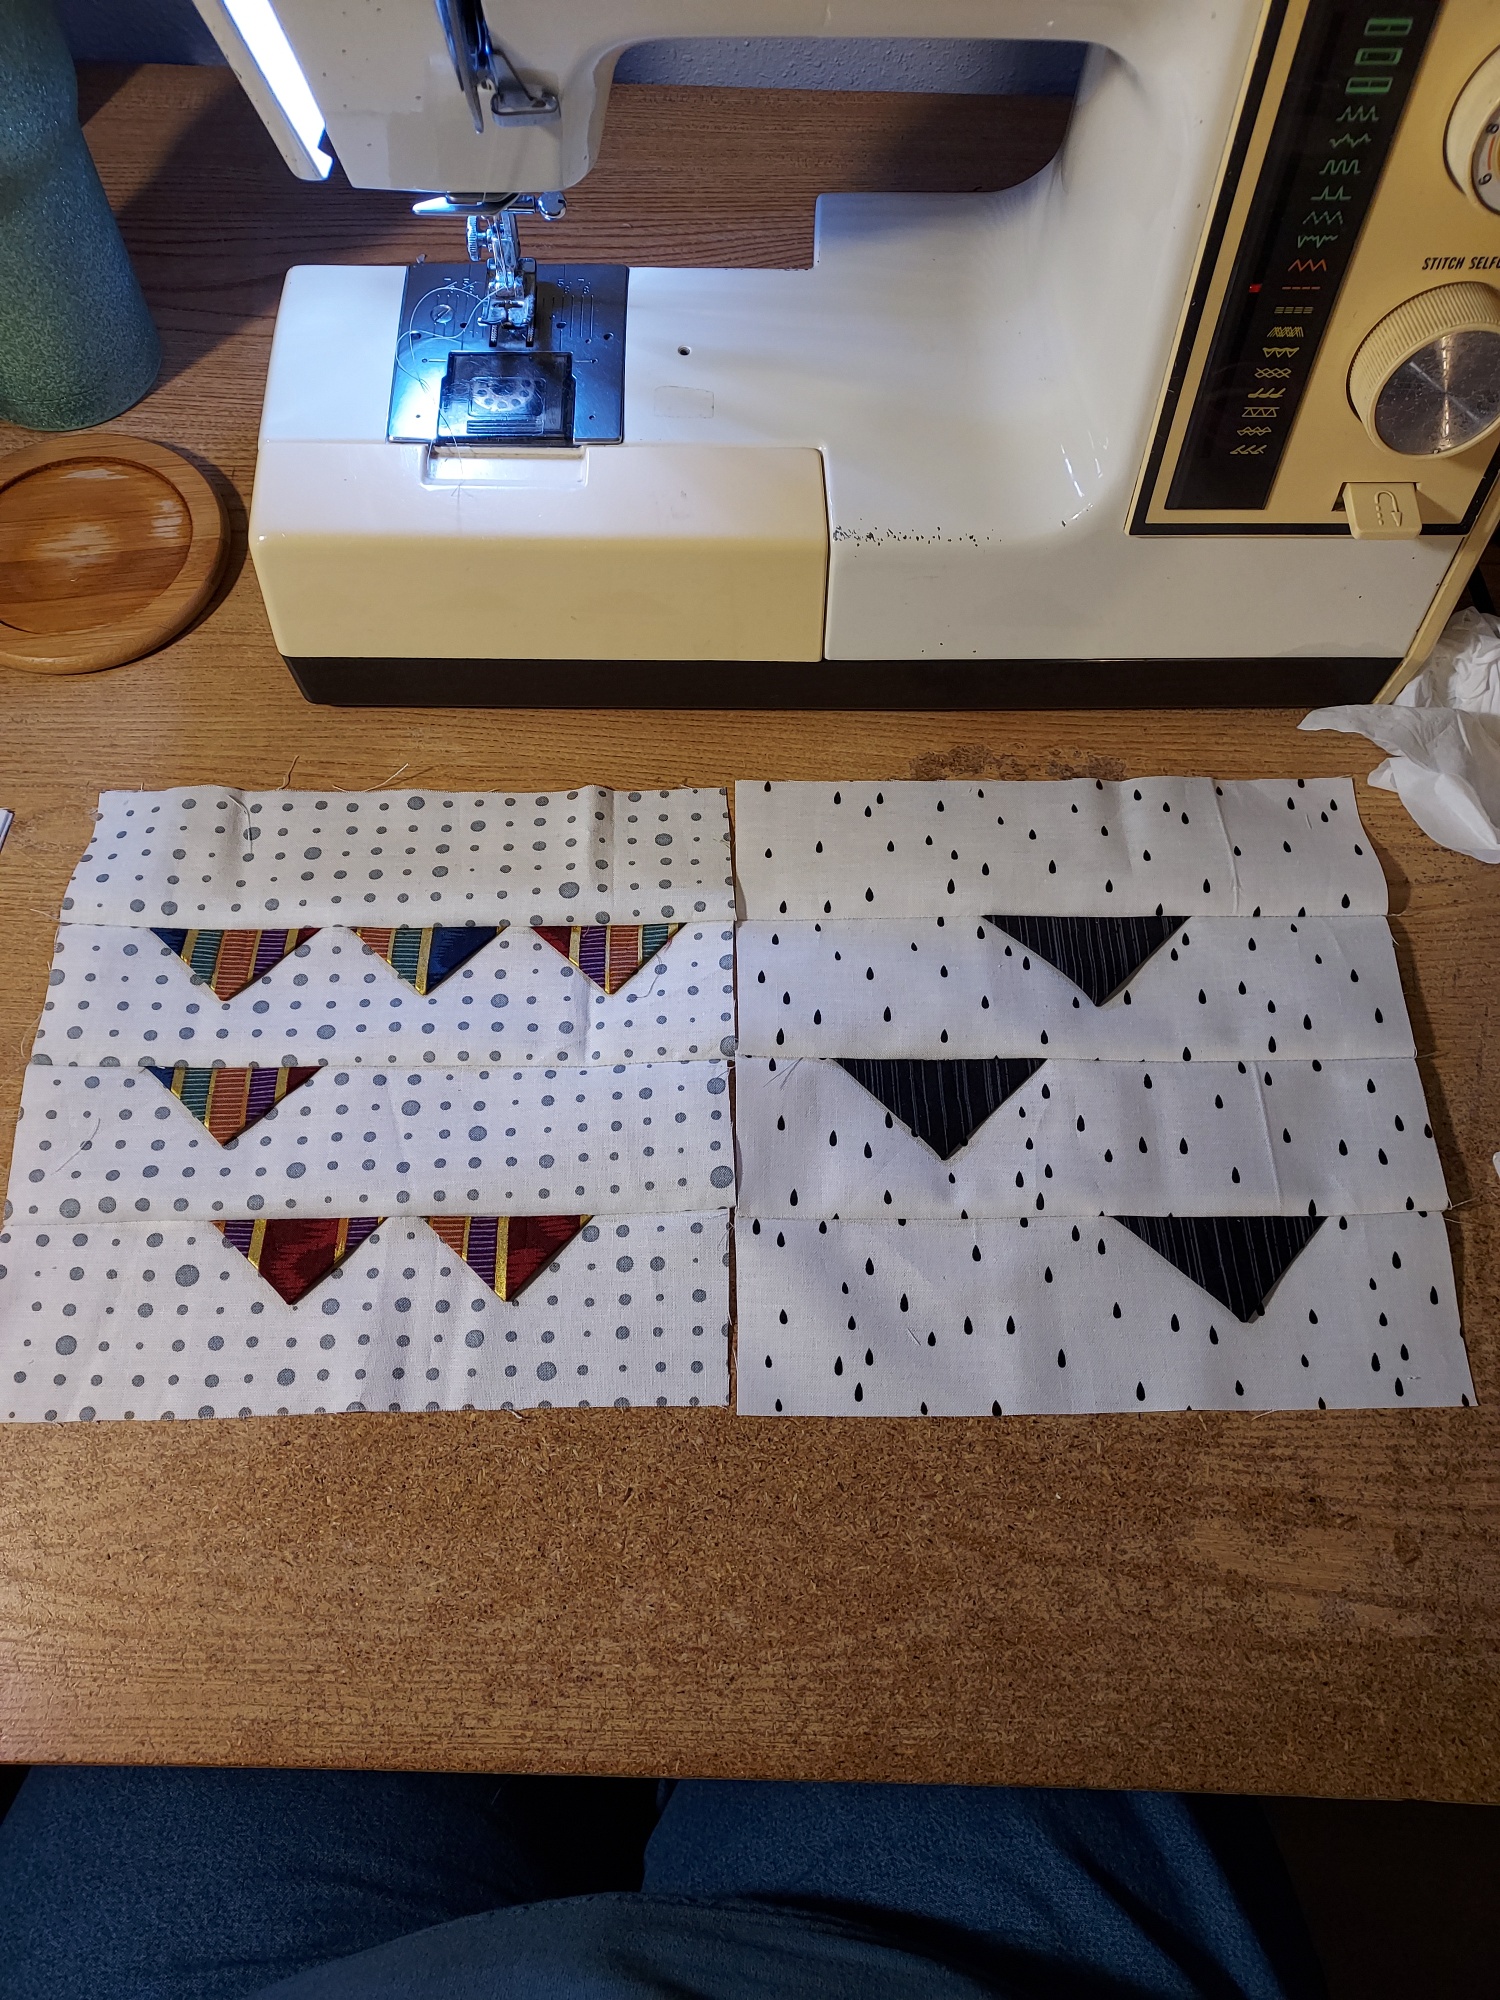
I've been asked several times about how I made the Prairie Points blocks that I have in progress.   So here is a quick tutorial for the block.   I'm still thinking about final layout for this quilt, so that will come later.

MATERIALS -- needed are given below in terms of what is needed for one block.

Background --
One 2.5" by width-of-fabric strip for each block, I used black on white fabrics for this, with one fabric per block,  (Note: there are occasional fabrics with pops of color, what can I say I don't like to follow the rules, even if they are mine....LOL.)

Prairie Points -
The first blocks were made to use some of the leftover bits of binding that I had left over, but scraps strips can be used as well.   I am using strip ranging from about 2.75" to 3.5" in width.  You will need about 4" in length for each prairie point wanted in your block, so anywhere from 12" to 20" in length per block depending on how many points you want. 


CUTTING ---
For each block you will need to cut 4 strips of background fabric that are 2.5" by 8.5" in size.   They can be all the same fabric, or all different, whatever you prefer.

And you'll need to cut enough 4" long strips for the number of points that you want - I've been doing 3, 4 or 5 per block.


MAKING THE BLOCK -- 

First off, I'll say this is not the 'traditional' way to make prairie points.   This method uses strips instead squares for the point.

Take your strip (in your desired width) and press in half if not using binding.   Start by folding down one half of the strip so that the folded edge is in the center as shown in the picture.  Pin in place.
Fold the second side down, folded edges meeting in the center.   Pin in place.  Then Stitch an 1/8th inch in from the cut edge of the folded point.
Press your points flat and trim the extra length off even with the raw edge of the strip.  Your prairie point should look like the picture.
"Back" side of your finished prairie point.  
Sew your prairie points to one edge of Three of the strips.  Play with how you arrange them.   This is very much random for me and partially depends on how many points I'm putting in a block.  The solid side of the prairie point should be facing up from the background fabric.
Sew the 4 strips together with the prairie points facing in the same direction.  Press the block flat.  
Some finished blocks - 


And more finished blocks:

Gratitudes:
1. For a job that I am loving, and a great boss who is willing to work his employees to help them get what they need.

2. For finally being over bronchitis, and for a new allergy med that seems to be helping open up my sinuses and ears.


Wednesday, December 14, 2022

Cross-Stitch Finishes - November 2022


More cross-stitch pieces have finally been made into finished items.   In this case, 5 mini pieces that I stitched years ago are now finished off as Christmas ornaments.   These will be given to friends as gifts this year.
This little cutie was stitched and finished off as an ornament for a friend.   I forgot to take a pic of the finished ornament.
This piece will eventually be finished into a mini wall-hanging for myself.

Standings on my cross-stitch - 
Started the month with 116 cross-stitch kits of various sizes and 13 Booklets with pieces I want to stitch

Finished stitching two of them..........and then bought 2 more.

So I remain at the 116 kits to stitch up.


Gratitudes:

1.  For the bad case of bronchitis I've been fighting almost being gone

2. For the beautiful Bernina sewing/embroidery machine that a quilt friend gave me 10 days ago when I was in TX for a very short weekend.

Scrap-Happy December 2022

 How can it already be December, it just doesn't seem possible that the year has flown by so fast.   Here are the scrappy things I worked on this past month.

4 plaid cozies were made from shorter pieces of plaid homespun fabrics I'd had forever and a day.


My bag was finished.   Turned out bigger than I thought, so i'm not sure I'll use it as a purse.    All fabrics in the bag were remnants and scraps.  The fleece used for the padding were the only things bought.

Inside of the bag, also made with scraps.

Circle block #3 - center was made from a scrap that I'd held onto for years because I couldn't figure out what to do with it.  Background was leftover after cutting strips for a different block on this one and the next.


Circle block #4 - center also another scrap I'd had for years.


Be sure to check out what everyone else has done this month:


Gratitudes:
1. For a department director at work that is understanding and works with the employees to deal with illness and family troubles

2. For my 90-yr old dad being out of the hospital and on his way to full recovery.