"For I know the plans I have for you," declares the Lord, "plans to prosper you and not to harm you, plans to give you hope and a future." Jer 29:11 (NIV)
Showing posts with label Orphan blocks. Show all posts

Friday, June 7, 2019

Snails Are Congregating

One more part of the bottom section is almost together.

Filler blocks at the top right of the section are from Sharon H., Debbie C, Elaine G, Karen W, Jean I, and Lois G.   All friend from the one quilt list. 

The snail in the bottom left corner were orphan swap blocks that were sent to me and the two that have names on them are from Sharon K (now Sharon H) and Marjorie Y. 

The shell of the upper left snail was made with charms from the Lotto quilt I made for the Sacramento get-together of the same group the signature blocks are from.

And as I get more of this last section together, I'm seeing that I won't have as many extra blocks as I had feared.   So they might end up pieced into the backing.  Or I might be lazy and find an inexpensive wide backing and use that. 

Once all the sections are together then I need to put a 4" or so border around the whole thing, but I haven't decided what I want to use for that.   Any ideas?

Gratitudes:
1. one paycheck (out of three behind) has been received and in perfect timing to pay bills for the rest of the month.  God's timing is perfect!

2.  Not running the AC to save on the utility bill is proving to be bearable.

Thursday, May 23, 2019

Snail Quilt So Far

The two big sections have now been sewn together.  And the filler section for the top section has now been made from orphan strip set sections in various shades of brown.

Left side shown here.


Right half of quilt shown here.

At the current time it is approximately 86" wide and    57" long.  I still need to add about 30" in length to the quilt and a final border about 3" in finished width.


Gratitudes:

1. Received one paycheck this week.

2. No rain even tho fronts have been going thru here.

Wednesday, May 22, 2019

More progress on Snail Quilt

I sewed the two halves of the second section together and then sewed the section to the first one, only to find I had not guestimated correctly on the wide of the second section .... oops.

The second section is 11" (finished) wider than the first one, and of course none of my orphan blocks fit the 11.25" size needed to fill the gap. 

As a result, I'm in process of making a filler section that will go the full height of the first section.  I'm using part of an orphan set of strip sets left over from a gift quilt I made 10 or so yrs ago.

Next pics are of a couple of the filler sections on the 2nd section of the quilt.  The blocks in these sections are signature blocks from a couple of get-togethers (IQGT) - one that I was at in person and one that I was only there in spirit.

The red/cream are from 2002 and the IQGT was one I was able to attend.  General consensus is that this one was held in CT.

Lynn Z and Mary G  signed the top two blocks, and Joanne W and Sandy B signed the bottom two.


These signature blocks were from 2014, which unfortunately was a yr that I couldn't afford to go.  But it's still wonderful to see names of people I've known for years now.


Gratitudes:

1. For the house/pet sitting job I've got coming up in June & July and the income from it.

2. For not having to worry about paying for AC while house-sitting.


Tuesday, May 21, 2019

Snail Quilt Progress

I'm slowly making progress on my snail quilt.  This section, approximately half of the full width of the quilt top before borders.  There are two sets of filler blocks in this - the section in between the two right hand snails are signature blocks from a quilt group I'm a part of.  From left to right these blocks are from: Mary G,. Anne M., Paula W., Margaret U., Jody J, Peggi Y.

Second set of filler blocks are at the bottom left of the picture and are left over blocks from a wedding quilt.


The section above will be joined to the left side of this section.
Once the middle section is sewn together I'll measure to see if I need to add more in width to it or to the top section in order to have the widths match up.

Gratitudes:
1. The tornados from yesterday missed the area where I live.

2. Ibuprofen works wonders for easing the arthritis pain in my feet.

Monday, May 20, 2019

UFO Weekend results

Finished up 5 quilted postcards which I forgot to take a picture of in their finished form...oops..... Next up was evening out the right edge of the first third or so of my snail quilt which I don't have a pic of (notice a recurring theme here?).   Width of the quilt right now without border is about 72".


Then made two  snail blocks from Orphan UFO blocks that were sent to me by a longtime quilting friend.   All added fabrics were from scraps or remnants.

These were all 6" finished swap blocks from swaps years ago on a now defunct email list (IQ).  The first snail was made with four 6" finished friendship star blocks
Shell of this snail was made from nine 6" finished 9-patches from a long ago swap from the same email list as above.


Start of the middle third of the quilt with two 12" tall snails and one that is 18" tall.  This may still get one more 6" or 9" tall row on the bottom of it yet.

The filler blocks underneath the large snail are signature blocks that were sent to me by the friend who sent the other orphan/UFO blocks.  These were from a get-together back in 2002 with the IQ group of quilting friends.  Don't remember where this GT was held, but it is fun to remember friends that are either no longer alive or no longer heard from.

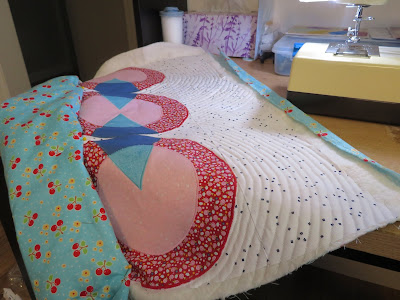
And the final project I worked on was getting the quilting underway on my Riley Blake challenge quilt.  The background on one side of the circles is done (shown here).   And I've started on the other side of the circles. 

The design for the quilting continues to evolve and at the moment, I'm going to echo in quilting the circles on the other side of the quilt from the applique.  And then fill in around that with the echo quilting like shown here.

Gratitudes:

1. While the storm on Saturday had  winds so high that the rain was going sideways, there was no damage to my house.  (Altho I did have to wait out the first wave inside Wally World.)

2. For God's hand of protection with the severe storm front that is due to go through the NE Tx area today and tomorrow.


Tuesday, May 14, 2019

Goodies in the Mail


As I've been working on my snail quilt shown below, I've been using orphan blocks both for the shells of the snails and for filler blocks and sections of the quilt.

One plus to this is I've been making a lot of progress in using up all of the orphans I've accumulated.  However, I'm only about a third of the way finished with the quilt and am running out of blocks to use.


Friends though have come to the rescue.  =)  My friend Susan sent me these two blocks for snail shells.


And my friend Red sent me this stack of blocks in 6" and 3" finished sizes to use as filler blocks for my quilt.   There are friendship stars, 9-patches, churn dashes and signature blocks.  All made by quilt friends from an online group that I've been a part of for over 20 yrs now.   Some of these gals are no longer alive, so the signature blocks bring back memories or wonderful times spent together.

Gratitudes:

1. Quilt friends near and far, new and old

2. Dry weather at the moment

Thursday, April 11, 2019

More snails arrive

Three more snails have been completed.   

The shells started with orphan blocks from many years and several states ago.  These were 8" blocks that were made for a BOM at a quilt store that were made with Thangles.  To bring them up to a usable size for the quilt I bordered each of the three blocks with a navy Fairy Frost that was in my stash.  All other fabrics are from scraps in my stash.


Gratitudes:
1. week is almost over

2. for savings.......

Wednesday, March 27, 2019

Snails Assembly

I've completed 21 snail blocks now, and have a max of 9 more orphan blocks that will work for shells for more blocks.   However, I don't actually know how many blocks I'll need to make the quilt fit my bed.   As a result, I figured I'd better start putting some of them together so I can get an idea of how many more I need to make. 

I'm just hoping to not have to make too many new blocks in order to finish this quilt, but the odds are that I'll have to make some because I'm running out of orphans that will work for the blocks.  I'm almost tempted to go see what I could buy on ebay in the way of orphans....but won't....lol.

To that end I started playing around with layouts for the first band of blocks.   To make things easier for me, I've been making blocks based on grids that are multiples of 3".  While I'll have lots of partial seams in the assembly of this, the common grid will make it easier to put together.

First layout had the snail blocks right next too the rest of them.  Didn't like this layout too much...
Onto the 2nd pass - added in orphan blocks with WOW backgrounds as filler blocks.   Starting to look better to me.

3rd pass for this first section, swapped out one of the orphan blocks with a different one and pieced filler sections for the open areas from smaller orphan blocks and block sections. 

This is about 42" wide and about half width of what I'm figuring for the finished quilt before a final border.  It is approximately 33" tall at this point.   I'm figuring I'll need about 2 1/2 sections, maybe 3 full sections for the finished quilt.  It will probably finish out at a king size because I like like my quilts to hang down over the sides of my queen sized bed.

Gratitudes:

1. My knee is definitely getting better, altho it still likes to give me fits when I drive.

2. Spring is here and the trees are filling with new leaves.

Monday, February 25, 2019

Weekend Sewing Wrap-up

Got a fair bit done over the weekend, some of which started from doing some straightening up in the room (the dining room area) where I do all my sewing. 

First up was this little mug rug made from a free kit that I'd picked up 18 months ago on what is called a "Mug Rug Run" by 5 different quilt shops over in Arlington TX.    The fabric was included in the kit for both the front and back.  I added a piece of fusible fleece for batting, and then birthed it to put it all together.  It's approximately 4" by 6" finished size if I remember right.  It will end up a gift for someone at Christmas time.


Next up was putting together these blue equilateral triangles that I'd had leftover from one of the few quilt classes (was one by Karen Combs) I've ever taken.  My friend Tracey who used to live in TN shared the fabric she'd hand-dyed for the class because I hadn't understood that I needed three shades of one color for the class.  These were leftover from the project.  I've put them together in this snack mat that is about 9" by 15" at this point.   Am debating whether to square off the ends or to bite the bullet on the binding and leave as is.   Also thinking about whether to embellish it any....


Next up was this denim tote bag that will be going to a longtime friend.   Denim and webbing for straps were from my stash.  Front pocket started with an orphan block and scrap fabric for the lining, fusible fleece for the batting in it.


Finally was the next snail block.  Orphan block used for the shell.   Scraps used for the body of the snail.  Someone gave it to me, but I don't remember who.  I think probably one of my friends from the Quilt Chicks list.  Finished size is 12" by 15". 


Gratitudes:

1. For the commissioned order that I'm continuing to work on - ultimately just it will bring in as much money as I made all of last year with my sewing.

2. Warmer and dry weather this week before the chill coming next week.

Monday, February 11, 2019

Orphan Block clean out


Couldn't sleep again today, so I went  through my orphan blocks and block parts in looking for something for a project that's percolating in my mind for a blog hop that i signed up for.

I weeded this pile of orphan blocks and block sections out as I was looking for what I wanted and they are in a box to give away.  I finally convinced myself that I don't need to keep all of them, esp. the stuff that I have no idea what to do with.

What is left I have an idea of what to do with them.   And the smaller ones probably will end up as filler blocks on my snail quilt.
Not sure who gave me these orphans, but I'm going to sash them out to a common size (10" I think to match the green star block under them), and then planning on putting them into a little quilt for one of the Hands 2 Help charities this year.   Not sure tho what color to sash with, maybe navy kona?
Over the weekend I got asked to make a quilted postcard for someone who is getting ready to celebrate her 90th BD.   Was told she likes blues, flowers and pansies. 

This had been given to me by someone who had been on a CQ list I'm on several yrs ago and I'd never figured out what to do with it.   I think that flower in the center looks much like a pansy.......so it will be the start of the postcard.

This is the second new commission received this weekend.   Not big, but every little bit helps.


And yes, I did find what I was looking for - these strips sets from scraps that I plan to use to test an idea that is in my head.  Just need to print out the PP pattern so that I can start working on it.  =)


Gratitudes:

1. Thankful to only work 2 miles from where the hematologist's office is after getting a call this morning telling me that the appt I thought was tomorrow was really this morning....sigh.......

2. That I was able to get my food prep for the week done over the weekend so that if I don't feel up to cooking on Wed after the infusion I don't have to worry about it.

Sunday, February 10, 2019

Snails all together........

With 9 blocks made I decided I'd better lay them out on my bed to see how things were looking so far. 

At this point, I'm thinking I'll make one more of the largest blocks (18" by 27" finished), and then I have orphan blocks pulled for 4 blocks with 9" shells (9" by 15" finished) and 2 with 12" shells (12" by 18" finished). 

I've started working on a layout sketch so that I can figure out how these are going to go together and how many filler blocks (and what in sizes) I'll need to make to finish the quilt.


Now to decide - border or no border.......hmmmmm, any opinions?

Gratitudes:
1. Being unable to sleep due to leg cramps means I've had extra time to get things done around here.

2. For all the blessings in my life.


Friday, February 8, 2019

Snail 6 & 7

I went through my orphan blocks and pulled out blocks that I thought would work for the shells on more snails. 

First up was this blue star block that had been bordered out to 15".  It was given to me yrs ago along iwth other orphan blocks by a quilting friend in Wisconsin.  Corners on the shell aren't perfect, but it'll still go into the final quilt.

The next orphan block I plan on making up is this block.   The block was given to me by an online quilting friend who was originally going to use it for a CQ block. 

I'm still debating what color body to put with the oranges & red.  This portion finishes out at 12".


Gratitudes:

1. That I'm at max out of pocket as they the work for pre-cert on chemo to start next week.

2. That I know who is in control when all seems to be out of my control and nothing works the way it did in yrs past with the clotting disorder.

Tuesday, August 7, 2018

Fixing Wonky Orphan Half-Square Triangle Blocks

I'm sure that most quilters every once in a while (surely not too often!) have blocks that just didn't quite turn out like they were supposed to.  I'll be the first to admit that not all of my blocks work quite right at times.

An example I'm not sure where these came from but these HST's have been floating around in my stash for a while.  These blocks started with the batik triangles that I had found in a scrap bin at some store once upon a time.   I then had made the HST's from them. 

However, when I laid them on top of the white fabric to sew them together had not left enough room between them for a correctly sized seam.  This is just one of the blocks and the narrow part of the seam allowance there is a scant 1/8th inch......and there were several that were literally only a few threads in width.  Definitely
not a good idea for use in a quilt!


In addition, some of my seams were a tad crooked....oops.....

So to make these usable for a quilt project, I first took an envelope and used it for a straight edge. 
Once I had it lined up, then I drew a line in so I could have something to stitch by.

Next up was restitching the seam line further over and making sure it was straight.
Once done with the stitching, I then trimmed the blocks to an unfinished size of 3 inches and pressed them open.  You can read more about how I  make my scrappy HST blocks in this post.
I then put them together into this snack along with one little block that has a quilty saying on it.

This is a funky picture because it looks like the mat isn't the same size on each and it really is because I trimmed it to size.


Gratitudes:

1. Had a nice quiet BD yesterday.

2. My long-arm is still working fine, even if the thread is being a pill.  Thankful that new thread isn't outrageously priced as I work to get the row-by-row quilt quilted.

Saturday, July 21, 2018

Christmas in July - Quilted Postcards

I love making quilted postcards to send friends and family for many different occasions and sometimes just to send a quilty hug to someone.   It is a lot of fun to make them for Christmas because there are so many different materials that can be used to make them special.

To start the process I use Pellon 71F Peltex One-Sided Fusible Ultra Firm Stabilizer to make the postcards. I get mine at Joann's and wait till I have a coupon for 50% off or it is on sale for that price or better.   I'll either cut the cards at 4" by 6" or 5" by 7" in size  The top of the postcard is placed on the fusible side of the stabilizer so that I can get everything attached.  Then I start adding the appliques or other embellishments.  I always finish them by satin-stitching around the outside of the postcard in a complementary color.

I typically will use a striped fabric for the back side of the card so that I have lines to guide my writing.  I use Wonder-Under to secure the fabric for the back side to the postcard.

Pics of some of the cards I've made and have at the moment, and a short description of what I used in each -

Onrmanents -
A free coloring page was used to make the ornament shapes.  Metallic rick-rack was used to trim the ornaments.  Metallic thread was used for satin-stitching.  And real ornament hooks were stitched on to the card.

Snowflake -
snow flake cut out of white Kona and then arranged on the postcard.  Button hole stitching done with gold metallic thread.  Decorative snowflake button sewn on by machine.

Cross-Stitch -
Mini cross-stitch piece centered on the card.  Bordered on top and bottom by coordinating fabric.  Orphan HST's were used on each side to complete the postcard.


Poinsettia -
Silk poinsettia flower pulled off the stem and all plastic removed.  Leaves and petals arranged on top of the card.   Secured with top stitching (with a straight stitch).  E sized gold beads machine stitched on for the center of the flower.  Petals trimmed as needed after the edges were satin-stitched.


Snowflake -
Starry fabric for the background was fused on first.  Then using the satin stitch on my machine I carefully stitched an inexpensive, plastic snowflake ornament onto the front of the card.
Flowers -
Christmas fabric for the background, Small silk flowers stitched on by machine, small faceted rhinestone type jewels machine stitched on for the flower centers.  Scrapbooking ribbon piece sewn on for the Christmas wishes.

Snowman -
Two circles of batting cut and appliqued on for the snowman.  Machine stitched smile, 3/8" buttons machine sewn on for the eyes and buttons.  Decorative santa hat stitched on , tip left unstitched in order to finish the card edges.

Trees -
Striped fabric for background, two sections of decorative Christmas ribbon (non-raveling, die-cut) stitched on, Scrap booking ribbon piece sewn on for the Christmas wishes.

Christmas trees -
The white is an inexpensive crocheted ornament that is stitched (zigzag stitch) onto the postcard.   Ornament was already beaded.

Free-form green trees for the other two.   3/8" buttons machine stitched on one of them, and a fun Christmas trim of light bulbs used for the second.  Again zigzag stitched on by machine.


So as you think about what you can do to make quilted postcards, don't think just about fabric.   Look around you at the possibilities of ready made ornaments, trims in the Christmas dept of fabric stores, scrap-booking ribbons and trims, charms, jewelry, and just about anything.  Old embroidered linens that have damaged sections could also be used to provide sections that are good enough for a postcard.

One thing to remember - if you're using 3-D trims, you may want to use a padded envelope to mail the card so that nothing is damaged.

Have fun with them.   And remember these are good to make for any holiday or season, or just because.

And a giveaway to help spark some ideas for you as  you make some postcards for Christmas -  I'll be giving away this assortment of trims, beads, lace motifs, buttons and silk leaves.   

To enter the giveaway, leave me a comment on this blog post telling me what holiday or occasion you would be most likely to make quilted postcards for.   If you are an anonymous blogger, then be sure to give an email address in your comment or I will have no way to contact you if I draw your name.  The giveaway will close at Midnight CST on Tuesday, 7/22.


Gratitudes:

1. For so many fun things to work with

2. For having friends and family to send things like these postcards to.


Wednesday, January 18, 2017

Treasures among the stash

As I've been cleaning things up in my fabric room and sewing room, along with sorting through fabrics over the last couple of weeks, I've found some fabrics that have made me scratch my head and wonder why I bought them.  And then there are the UFO blocks which never seem to get used up.

Two of those came together this week as I took a quick break from working on the challenge quilt.   The fabric used in this hanging towel was one I found in my non-quilting stash as I sorted thru it.   It is a cotton, waffle-weave fabric and a lovely lt green color.  It was a remnant so I'm sure that is why I bought it.  Not sure what I'd planned for it.

However, it has worked perfectly for this hanging towel.  I used 1/4th of the piece so I have enough fabric left for 3 more of the towels.   Just need to make tops for them after I find more fabric that will go with the green.

The patchwork at the top was in my orphan block tote.   A little bit of fusible fleece to give some padding to it and quick work to stitch it all together.  This will go into my gift tote for when I need a quick something for a gift.  =)

Gratitudes:
1.  Rain instead of snow!

2. The receipt of the new-to-me desk and carpet protector from work as we get ready to move offices.

Sunday, February 21, 2016

Lots of sewing going on.........

Finished the front to the T-shirt quilt this morning.  Am thankful to have this much finished on the quilt.  Next up is finding the yellow headed quilt pins that I need to take and pin it together with so I can get the quilting started.  

Still aiming to have it all finished by the middle of March...hopefully I'll be able to hold to that schedule with all that is coming up at school, medical issues and the new PT job that I've got.

Next up are the four pillows that I need to get done for the same customer and more scrub tops for my very patient, long-time customer.  Need to get at leas 6 more done before I ship a batch to her and want them done before the middle of March as well if I can manage it.

 And for a change of pace - I bordered a couple of orphan blocks with black to bring them up to 9.5" square.   These will be mug rugs and I'm debating on whether to leave them as is, or to add on a section to one side on each of them to make them rectangular.   The original blocks were from patterns published by the now defunct Foundation Piecer and had been two of 12 stained glass patterns.   I used hand-dyed fabrics in them and love how they turned out......but they were a pain to make and very tedious.   And taking out the tissue paper I used as a foundation was a real pain.     These will most likely be put up for sale when finished.

Gratitudes:
1.  The past two days of fundraising at the high school went well for the Skills team at school and we've made about 70% of what they need to raise to go to state.

2. For my body hurting after working the fundrasing with the kids the last two days because it means that I'm still alive.